
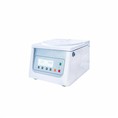
As a provider of high - quality chemistry analyzers, I understand that maintaining these sophisticated instruments is crucial for accurate and reliable test results. Over time, parts of a chemistry analyzer may wear out or malfunction, and knowing how to replace them is essential. In this blog, I'll guide you through the general process of replacing parts in a chemistry analyzer.
Step 1: Identify the Problematic Part
The first step in replacing a part of a chemistry analyzer is to accurately identify the problematic component. This may require a combination of diagnostic tools and technical knowledge. Some common signs of a failing part include inconsistent test results, error messages on the analyzer's display, or unusual noises during operation.
For example, if the analyzer is producing inaccurate absorbance readings, the problem could lie in the photometer. Other potential culprits might be the cuvette transport system if samples are not being properly moved through the analyzer, or the reagent dispensing system if reagents are not being added in the correct volumes.
Step 2: Gather the Necessary Tools and Replacement Parts
Once you've identified the faulty part, the next step is to gather the tools and replacement parts you'll need. The tools required can vary depending on the specific model of the chemistry analyzer and the part being replaced. Common tools include screwdrivers (both Phillips and flat - head), wrenches, and pliers.
When it comes to replacement parts, it's crucial to use genuine parts that are specifically designed for your chemistry analyzer model. Using non - genuine parts can not only void your warranty but also lead to further issues and inaccurate test results. As a supplier, we offer a wide range of high - quality replacement parts for our Auto Chemistry Analyzer, Auto Clinical Chemistry Analyzer, and Automatic Chemistry Analyzer models.
Step 3: Power Down and Prepare the Analyzer
Before you start replacing any parts, it's essential to power down the chemistry analyzer and unplug it from the electrical outlet. This is a safety precaution to prevent electrical shock and damage to the analyzer.
Next, you'll need to clean the area around the part that you're going to replace. Remove any dust, debris, or spilled reagents that could interfere with the replacement process. You may also need to remove any covers or panels that are blocking access to the faulty part. Make sure to keep track of all the screws and other small parts that you remove, as you'll need to put them back in place later.
Step 4: Remove the Faulty Part
Once the analyzer is prepared, you can start removing the faulty part. Carefully follow the manufacturer's instructions for removing the part. This may involve unscrewing bolts, disconnecting electrical connectors, or releasing clips.
For example, if you're replacing a pump, you'll need to disconnect the tubing that is attached to the pump and then remove the mounting screws that hold the pump in place. Be gentle when handling the part to avoid causing any additional damage.
Step 5: Install the New Part
After removing the faulty part, it's time to install the new one. First, make sure that the new part is the correct model and is in good condition. Check for any signs of damage or defects.
Follow the reverse steps of the removal process to install the new part. Connect any electrical connectors, attach tubing, and secure the part with the appropriate screws or clips. Make sure that all connections are tight and secure to prevent leaks or malfunctions.
Step 6: Test the Analyzer
Once the new part is installed, it's important to test the chemistry analyzer to ensure that it's working properly. Power on the analyzer and run a series of calibration tests and quality control samples. Check the test results to make sure that they are accurate and consistent.
If the analyzer still isn't working correctly, double - check all the connections and make sure that the part was installed correctly. You may also need to consult the analyzer's technical support team or a qualified technician for further assistance.


Step 7: Document the Replacement
After successfully replacing the part and testing the analyzer, it's important to document the replacement. Keep a record of the date of the replacement, the part that was replaced, and any calibration or test results. This documentation will be useful for future maintenance and troubleshooting.
Tips for Part Replacement
- Read the Manual: Always refer to the chemistry analyzer's user manual before attempting to replace any parts. The manual will provide detailed instructions and safety precautions.
- Training: If you're not familiar with the replacement process, consider attending a training course or having a qualified technician perform the replacement.
- Maintenance Schedule: Follow a regular maintenance schedule to prevent parts from wearing out prematurely. This can include cleaning the analyzer, changing filters, and performing routine checks.
Conclusion
Replacing parts in a chemistry analyzer is a task that requires careful attention to detail and technical knowledge. By following the steps outlined in this blog, you can ensure that the replacement process is carried out safely and effectively.
As a leading supplier of chemistry analyzers, we're committed to providing our customers with the highest - quality products and support. If you have any questions about part replacement or need to purchase replacement parts for your chemistry analyzer, please don't hesitate to contact us. We're here to help you keep your analyzer running smoothly and ensure accurate test results.
References
- Manufacturer's user manuals for chemistry analyzers
- Industry standards and guidelines for clinical laboratory equipment maintenance